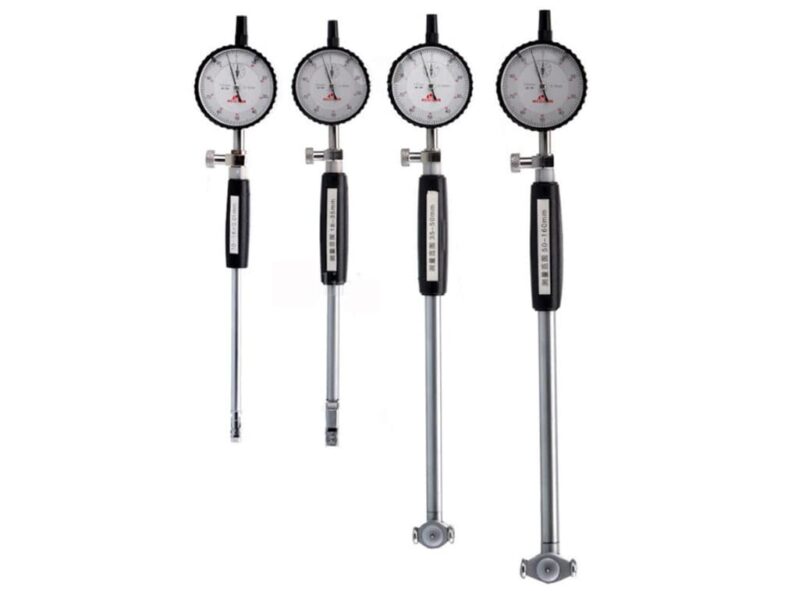
Every metrologist loves a bore gage. Ok, maybe love is a strong word here, but every metrologist can certainly appreciate the bore gage for its important uses. Bores, more commonly known as holes, present a common conundrum for many standardized measurement tools. Different than the typical surface structure, bores are encountered frequently in the world of metrology in the shape of holes, pipes, cylindrical parts, and more. Specifically designed to be used when measuring a hole, the bore gage solves the problem of trying to collect any required dimensional data. A dial bore gage in particular is used for the specific task of measuring the inside diameter of a hole. Once it is set, using a bore gage is a pretty straightforward endeavor. However, the process of setting a bore gage must be well understood and never skipped in order to allow for precise measurement. Today, we will describe the three main methods used to set a bore gage and explain the advantages and disadvantages of each.
The process of setting a bore gage
Understanding the process of how to set a bore gage is important for any metrologist to know. Whether working in manufacturing, machining, data collection, or any other job that requires high level measurement, you will likely encounter a bore and need to know how to properly measure it. The first step in proper bore measurement is proper bore setting. Knowing how to set a bore gage generally as well as why this process is important will ensure that you can take accurate and precise bore measurements whenever necessary.


The how of setting a bore gage
The general concept of how to set a bore gage is reasonably straightforward. You begin by setting up the tool you will use as a reference to the size of the bore you plan to measure. Then, you set up the bore gage with any needed extensions required for the diameter of the bore you are measuring. You then place the bore gage against the reference tool and adjust it such that it is properly fit to the tool. Eventually, you want to use the reference tool in order to set the zero point. What differs between the different methods of setting a bore gage is the tool being used as a reference point. Additionally, the specifics of pairing the bore gage with the reference tool vary slightly as different reference tools have varying structures. What remains the same is that the reference tool is used in order to set the zero point on the bore gage based on the specific size of the bore being measured.
The why of setting a bore gage
Setting a bore gage is pivotal to maintaining accuracy when taking bore measurements. This is because setting the bore gage ensures a true reference point of zero. On a bore gage, the reference point is used as the nominal size. It is the distance from the nominal size that becomes the measurement, therefore the nominal size must be accurately set in order to gather accurate data. Additionally, each bore is different. Taking precise measurements of a bore requires the process of setting the bore gage so that it is matched to the particular bore being measured. Therefore, understanding this process is important to be able to complete it each time you are working with a new bore. Overall, the reason why setting a bore gage is important is that the accuracy of the entire measurement rests on it being set properly. While this takes practice to perfect, knowing how to set a bore gage is an important skill for anyone working in machining or metrology.
General tips for setting a bore gage
Whenever you are setting a bore gage, there are some core ideas that remain important no matter what method you decide to use. All of your tools must be cleaned in order to eliminate any dust or debris. While some measurements are larger and therefore less impacted by contents on your tools, precision can be greatly impacted by even a little dust, especially when working with more minute dimensions. Cleanliness of your tools will impact your ability to properly set the reference zero point on your bore gage. When choosing a method of setting a bore gage, you will need to consider what tools you have available and your own skill set or ability to use those tools. Remember that having a partner to help with the setting process or to double-check your work can be helpful, especially when you are first learning how to properly set a bore gage. All of your measurements using a bore gage stem from the initial accuracy of the setting process, so the more safeguards you have to check your work, the better.
Multiple methods for setting a bore gage
When researching setting a bore gage, the most common instructions will be regarding the process when using a micrometer. However, there are three ways to set a bore gage and they each come with pros and cons. You can set a bore gage using a micrometer, using a ring set, or using a bore gage setting kit. What method you choose depends on the tools you have available and can vary depending on the circumstances as well. Having a handle on all three is important to figure out the best method to use and to be able to manage different challenges that may arise in the context of measuring a bore with a bore gage.
Using a micrometer to set a bore gage

Using a micrometer to set a bore gage is the fastest and most convenient method available. However, setting a bore gage with a micrometer is also the least accurate way to do so. The reason using a micrometer may be the most convenient method is that most workspaces have the tools required readily available. There may be times when this method is necessary, when you are in a pinch and need to set a bore gage quickly with lack the specific tools made for this process. However, using a micrometer to set a bore gage is not the most recommended method because you risk the accuracy of resulting measurements. One of the reasons that measurement errors can result is the condition of your micrometer itself. It is challenging to avoid measurement inaccuracies caused by the misaligning of the spherical measuring points of the bore gage to the micrometer. If you are simply a hobbyist or only have a micrometer available, a micrometer can be used to set a bore gage. Other methods are preferred for higher levels of precision.

The steps to using a micrometer to set a bore gage are as follows:
- Set the micrometer to the size of the bore you are going to measure
- Set up the bore gage with any needed extensions for the specific bore diameter
- Place the bore gage between the spindle and the anvil of the micrometer
- Settle the bore gage into the micrometer by using a gentle rocking motion
- Zero the indicator on the bore gage to the minimum reading to have your nominal size
Using a setting ring to set a bore gage

Using a setting ring to set a bore gage is the most accurate method available. When using setting rings to set a bore gage, the actual measurement goal is duplicated by the setting ring, resulting in a precise match between the bore being measured and the bore gage doing the measuring. This creates a very easy way to match the size of the part. The greatest disadvantage of using a setting ring to set a bore gage is the expense of the method. Essentially, you will need a setting ring that matches each size of the different bores you measure. This limits your flexibility unless you invest in a large set of setting rings to use for different measurements. These can be expensive tools and so acquiring numerous setting rings for each potential bore size can add up. However, if measuring bores is a regular part of your work, using setting rings to set a bore gage has proven time and again to be the most accurate method. Therefore, having a range of setting rings may be your best option if you rely on precision for bore measurements.
The steps to using a setting ring to set a bore gage are as follows:
- Lay your master ring on a smooth, hard surface (such as a granite surface plate)
- Set your bore gage in the ring, thus providing support to the bore gage
- Adjust the sensitive contact point of your bore gage until the indicator reads zero to have your nominal size
Using a bore gage setting kit to set a bore gage

A final method of setting a bore gage involves using a bore gage setting kit. While it may seem obvious, a bore gage setting kit is specifically made for this very purpose. What a bore gage setting kit offers is the flexibility of being able to measure a range of different sized bores without the cost of buying individual setting rings to do so. A bore gage setting kit utilizes a gage block assembly in order to create a reference master. The availability of gage blocks is a major advantage of this method and using these in a bore gage setting kit will be cheaper than the alternative of buying different setting rings without sacrificing the resulting accuracy. The biggest disadvantage of using a bore setting kit to set a bore gage is the time it takes to assemble the gage blocks that will accurately match the needed nominal size. You also may have some measurement error result from wringing that occurs between gage blocks. However, if you are looking for a more accurate way to set a bore gage than using a micrometer, but are unable to procure numerous setting rings, than a bore gage setting kit is a great method.
The steps to using a setting kit to set a bore gage are as follows:
- Set up the required gage blocks into a clamp with jaws at both ends of the blocks
- During set up, wring the blocks together by sliding their faces against each other in order to create a light bond
- Lay the bore gage against the correctly sized gage block and set the indicator to zero to have your nominal size
Conclusion
Knowing how to set a bore gage is an important skill in manufacturing, machining, data collection, or any other job that requires high level measurement. When it comes to ways to set a bore gage, you have options. You can use a micrometer, a setting ring, or a bore gage setting kit. Which method you choose will depend on the tools you have available and the importance of your accuracy for the current measurement. If you want to learn more about setting a bore gage, check out this video here or contact our expert staff at Higher Precision.
FREQUENTLY ASKED QUESTIONS
- What are the possible ways to set a bore gage?
There are three possible ways in which to set a bore gage. The first method of setting a bore gage is to use a micrometer. While often the most convenient method, using a micrometer to set a bore gage is the least accurate way to do so. When using a micrometer, the size of the bore is matched to the micrometer between the spindle and anvil, which is then used to set the zero point on the bore gage. A second method for setting a bore gage is to use setting rings. This is by far the most accurate way in which to set a bore gage. However, it is also the most expensive due to needing to buy a range of setting rings for different sized bores. When using a setting ring to set a bore gage, the zero point is set on the bore gage through matching it to the size of the setting ring. The third method of setting a bore gage is to use a bore gage setting kit. Not as expensive as having setting rings, using a bore gage setting kit provides a cheaper way to get accurate measurements. However, using gage blocks in this process requires a bit more skill and a great deal more time. When using a bore gage setting kit to set a bore gage, you first wring together the required gage blocks and set the bore gage using them as a reference point for zero.
- Why are some general tips for setting a bore gage?
Setting a bore gage is a common occurrence in most fields of metrology. While the method you choose to use will vary depending on the circumstance, there are some basic factors to keep in mind no matter how you are setting a bore gage. Keeping your tools clean is vital. This means both your bore gage as well as any tool you are using as a reference point to set it. Removing dust and debris will ensure a more accurate measurement. Also, keep in mind your own skill level. Depending on the tools you have around and your familiarity with the various ways to set a bore gage, your decision on which method to use might change based on context. Different measurement tasks call for different degrees of accuracy. Know the importance of setting the bore gage properly and whether you will be able to do so before deciding how. Particularly when accuracy is key, having a partner to check your measurements is always a great idea. We are all susceptible to human error. Having someone cross-check the way you have set your bore gage is a good habit that helps ensure measurement precision.
- What does Higher Precision recommend as the best method for setting a bore gage?
The Higher Precision team is well-versed in setting bore gages, whether using a micrometer, a setting ring, or a bore gage setting kit. However, it is tough to pick the best method. The decision comes down to context every time. While we would not advise using a micrometer to set a bore gage because of the limited accuracy, there are a number of situations that call for this method. Perhaps you only have a micrometer available and need to set a bore gage, or perhaps this is an unimportant part of the project you are working on, but time is of the essence. While using a setting ring to set a bore gage may be the best choice when it comes to complete accuracy, not everyone has the funds to buy or access to the required equipment. If you are working with bores frequently and need to set a bore gage daily across a range of different sized bores, acquiring a number of setting rings may be the best way to assure consistency. Finally, while using a bore gage setting kit is the most straightforward, it is also more time intensive and not everyone’s preferred method. Having a bore gage setting kit around may be your happy medium for getting accurate results at a lower cost. Ultimately, choosing the best method for setting a bore gage depends completely on context.
GLOSSARY TERMS
- Wringing
Wringing involves sliding two ceramic gage blocks or steel gage blocks together to make them adhere to one another in the process of measurement. Wringing occurs because of molecular attraction between the gage blocks resulting from air pressure and surface tension. In order to wring together two ceramic gage blocks or steel gage blocks you simply slightly oil the surface of the gage block, slide it perpendicularly across a second gage block while applying pressure, and rotate the gage block while applying further pressure until it is aligned in a parallel manner with the second gage block.
- Zero Point
The zero point is the point of measurement at which nothing of the measured variable exists and therefore is equal to zero. Having a meaningful zero point is important for precision and accuracy in most measurements, as the final measurement outcome is based entirely on the point at which the measurement is equal to zero. Different tools may be set to a zero point and the zero point may be adjusted depending on the goal of a particular measurement.