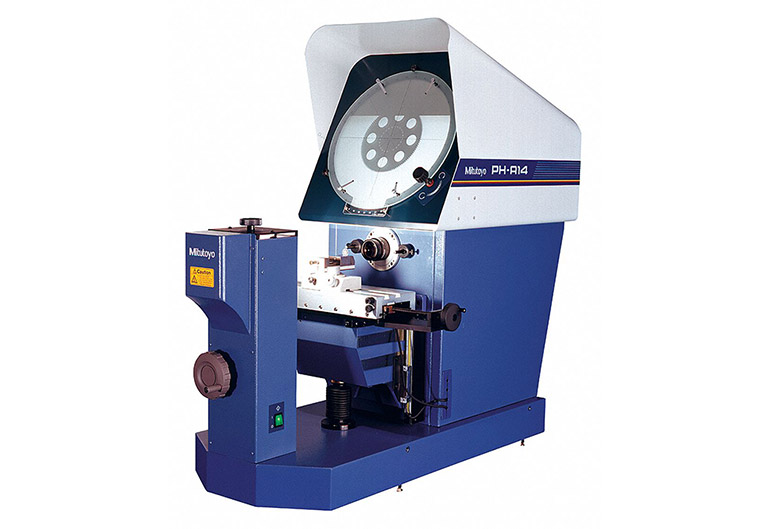
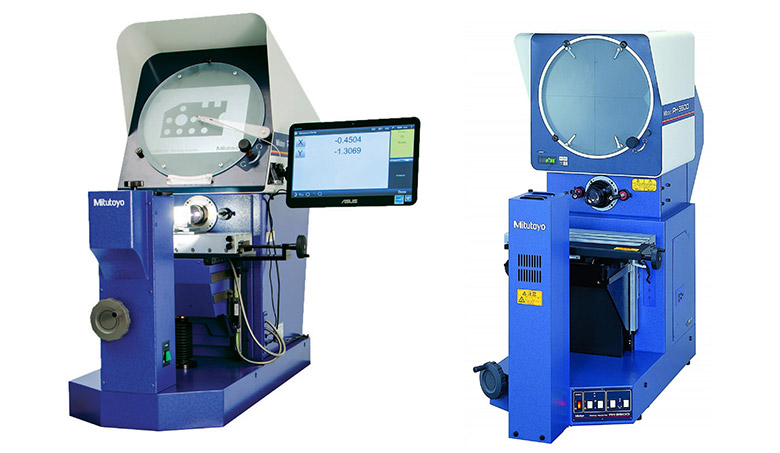
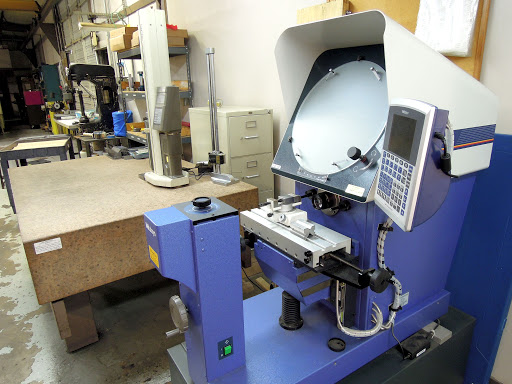
An optical comparator is a precision measurement tool that projects a magnified identical image of small parts or objects in order to collect dimension measurements and complete inspection protocols. Also known as a profile projector, an optical comparator makes it possible to take precise and accurate measurements of parts that might otherwise be challenging to work with based on size. Through a scientific magnification process using lights and mirrors, the optical comparator creates a completely comparable and enlarged version of the part. These profile projectors do just that, they project a profile of the part being measured in a way that helps simplify the measurement. Through this accurately magnified representation of the part, you can take any measurements you need and ensure that all specifications are met.

Optical comparator basics
The optical comparator allows for precise measurements to be taken of small parts without compromising on accuracy. This article will explain what an optical comparator does, how an optical comparator works, and specific advantages as well as disadvantages of working with optical comparators. In addition, you can browse the different types of optical comparators available and take a look at the top optical comparators sold through Higher Precision.
What is the role of the optical comparator?
Optical comparators make metrology jobs doable that might otherwise be impossible. When completing precision measurements, no matter what your industry or task, accuracy and reliability are top priority. The smaller a part gets or the more minute an area of an object is that you are working with, the harder it is to maintain the required quality of the measurement. That is where the optical comparator steps in to help. The optical comparator, or the profile projector, magnifies a proportionally exact representation of the original part, thus increasing the space you have to work with.
Optical comparators are used across a wide range of applications in a diverse set of industries. Uses for an optical comparator include working with gears, threads, and cams, completing complicated shape stampings, as well as making contour comparisons. These highly applicable tools can be used in watch or clock making or repair, instrumentation development, aviation, detection metering, scientific research, aerospace, electronic manufacturing, and many more.
Advantages and disadvantages of optical comparators
The advantages of an optical comparator are aplenty, but there are also a few disadvantages of working with this tool that are important to keep in mind. Optical comparators have very few moving parts, which helps to increase the accuracy of the eventual measurements. Given that the main job of the optical comparator is to project a more workable image of the original part of object, the device itself does not require much movement or adjustment. With fewer adjustments there is less room for error and therefore higher accuracy. Another advantage is that optical comparators avoid the presence of parallax error, or a shift in an object’s position perceived as it is seen from various angles. Additionally, optical comparators have fewer parts than other comparator tools, and so result is in a lighter tool that is easier to relocate. Finally, the optical comparator specializes in magnification. Given the high degree of magnification that can be attained, these tools are incredible for precision measurements.
Luckily, the disadvantages of optical comparators are workable and do not impact the most important part of the measurement process, the accuracy of the final measurement. Optical comparators are quite expensive. However, they are durable when well-handled and should not require regular replacement, which saves money over time. These tools require a separate electrical source due to the large amount of power required. Additionally, based on their mechanism of magnification, the optical comparator works best in a dark setting. This may limit the workspaces that are appropriate for these devices, but again will benefit the operator in the long run by providing the most accurate measurements. Finally, another disadvantage of optical comparators is that they are not conducive to continuous use. Since the scale in question is viewed through the machine’s eyepiece, adjustments must be made in a discontinuous fashion between measurements.
Optical comparator measurement accuracy
It is important to note that when it comes to the measurement accuracy of optical comparators, there is no national American or international standard that exists. There are guidelines within the field and other national standards exist in some countries, like Japan, and serve as a regulation starting point. The most important aspects of accuracy to consider when completing calibration and verification of your optical comparator include length accuracy, magnification accuracy of the transmitted/contour illumination, magnification accuracy of the reflected/surface illumination, and squareness accuracy.
Length accuracy is important because this will impact measurements whenever the stage is used along either the X or Y axis. Whenever the measuring stage is moved along either the X or the Y axis, then the squareness accuracy comes into play. Both of the types of magnification accuracy impact measurements that are made using the measuring screen. Depending on the type of measurements you are completing with your optical comparator, one of the accuracy points or multiple of these accuracy points might prove important. One issue that arises with measurement accuracy and optical comparators is determining the exact edge. On older models this has presented a challenge. However, most optical comparators come with an automatic edge sensor these days that helps to reduce the error when determining the edge by getting rid of any ambiguity on the part of the operator.
As with all precision measurement tools, regularly calibrating your optical comparator will be crucial to maintaining measurement accuracy. The goals of calibration will change based on the specific configuration of your optical comparator as well as based on your intended use for your tool. There are typical methods and techniques used to calibrate an optical comparator across all 4 types of accuracy, and many metrology manufacturing companies offer services to complete calibration for you.
Types of Optical Comparators
Digital optical comparator
Digital optical comparators are fast, accurate, and easy to use. These digital optical comparators are incredibly accurate as they eliminate risk of operator error, have a higher throughput than other optical comparators, are capable of electronic documentation of data, are fully digital in functioning thus avoiding recording errors, are remarkably simple to use, and come fully automated with state-of-the-art technology. Importantly, digital optical comparators leave a smaller environmental footprint since all measurement processes are digitized and energy is efficiently used to work the machine. Digital optical comparators come built in different configurations designed to match the measurement job you need to complete.
Bench-top optical comparators (table-top)
Bench-top optical comparators, also known as table-top optical comparators are one of the most common types of optical comparators sold today. These high performance tools are typically reasonable in price and are built to be movable. Designed using smaller and lighter weight parts, these machines are ideal for manual workstage travel scenarios. With precision optics, technical lighting, and a customizable workshage, bench-top optical comparators are a great addition to any metrology work space.
Compact optical comparators
With size a growing concern in any metrology workshop, the compact optical comparator might be just what you are looking for. A few companies have designed micro versions of optical comparators in order to assist those who need this tool, but do not need the bigger version. With all of the same capabilities at your fingertips, compact optical comparators are ideal for when you need the magnification and projections capabilities of an optical comparator on a smaller scale. Additionally, there are pocket and hand-held optical comparators that can be used for smaller jobs using the same mechanism as their full-size counterparts. If you regularly complete measurements using an optical comparator or have high-profile tasks with expensive results, we advise investing in a full-size optical comparator to ensure the highest level of accuracy and precision.
Horizontal optical comparator
Horizontal optical comparators are defined by the way in which the projection is directed. On a horizontal optical comparator, the main axis of the part being measured is perpendicular to the projection screen plane. Optimal for parts or objects that are medium to large in size, horizontal optical comparators are often used when working with heavier parts and shafts. Horizontal optical comparators are regularly used with parts that must be held in place or fixed on centers.
Vertical optical comparator
Vertical optical comparators are defined by the way the projected image is directed. When using a vertical optical comparator, the main axis of the part being measured is placed parallel to the plane of the projection screen. The vertical optical comparator is the most common type of optical comparator and typically used when working with smaller, lighter weight parts or parts that are flat. The vertical optical comparator is also a suitable tool for measuring parts or objects that are flexible and soft in build.
How to use an optical comparator
There are a few different types of measurement that can be done using an optical comparator. First, you can take a measurement by comparison. This is one of the original functions of an optical comparator, hence its name. When completing this type of measurement, you are making a comparison between the projected part and an overlay screen that is called a chart gage. Second, you can take a measurement by screen rotation. This technique involves rotating the screen in order to get the measurement of different angles on the part. Third, you can take a measurement by motion. Measuring by motion with an optical comparator is used when working with longer parts that do not fit at one time on the measurement screen. There are built-in geometric processors that help to complete these measurements.
Using an optical comparator is simple and straightforward. You will want to start by assessing the angle of the comparator, making sure it is correctly positioned. Set the angle and determine how many points are needed on the screen in order to measure side one of the part. Then, adjust the comparator to pick up each of the points. You will next move onto side two and complete the same steps. Most modern optical comparators have a useful feature directing you to each required point on each side. This helps you to make sure you collect all the point you require for the complete measurement. Once the points are collected you have data regarding the necessary angles and line intersections. Next, you collect the radius for the part and follow the machine guidelines for collecting the three required points. Afterwards you have the circle center and diameter. All measurements are stored in the optical comparator’s memory allowing you to go back and review any data you have previously collected.
How to choose the right optical comparator
As we have mentioned, optical comparators do not come cheap. However, these amazing tools are capable of one-of-a-kind measurements. We will provide you with five simple steps to make sure that you choose the right optical comparator for your precision measurement purposes. When buying an optical comparator, there are some consistent factors that must be taken into consideration in order to make an educated purchase.
First, you will need to determine which light path is required for your measurement application. There are two options of light path for an optical comparator – horizontal light path and vertical light path. A horizontal optical comparator light path is required when working with parts that are larger in size or heavier in weight. If you will be working with shafts, castings, machined components, or thread forms, you will likely benefit from a horizontal light path. Vertical optical comparator light paths on the other hand are preferred for parts that flat or stamped. O-rings and gaskets are examples of parts you might need a vertical light path for measurement.
Second, when buying an optical comparator, you will want to ask yourself the what the required size for both the screen and the stage will be for what you are regularly measuring. You will need to consider how much of the part needs to be viewed at any one time, keeping in mind that you will ideally need one inch of margin when viewing image overlay. Additionally, you will want to think about the travel and weight capacity necessary for the parts you will be working with.
Third, the lenses you need will be important in your optical comparator purchase. Optical comparator lenses come in different magnifications and resolutions that you will use to determine your ideal tolerance. You will want to focus on the minimum resolution attainable with each style of lens available. As a fourth factor to tackle when purchasing an optical comparator, determine if you will be using overlays or what type of software and readout you plan to work with. If you plan to exclusively work with overlays, you will save some money. However, more complex or repeatable measurement readouts can greatly benefit from the presence of error management offered by a software system. Fifth and finally, in order to choose the right optical comparator, you need to decide on the different options or tooling variability you want. Consider what surface you plan to be working on most often and how to most securely hold the optical comparator in place, as both of these factors will impact accuracy and precision.
Shop our optical comparators for sale:
Conclusion
Optical comparators are a necessary tool for anyone serious into metrology. These incredible tools create a magnified image a part, leading to simple and accurate measurements. As with any precision measurement tool you will want to know the performance specific you require for your optical comparator. The devices are used across a number of fields and contexts. Reach out to us at Higher Precision today to hear more about our optical comparator selection or to speak with an optical comparator specialist about questions you may have.
FREQUENTLY ASKED QUESTIONS
- What are the advantages of using an optical comparator?
- Just the versatile measuring capabilities of the optical comparator are a huge advantage of this precision measurement device. Additionally, optical comparators offer more than just dimensions by providing length and width measurements as well as revealing possible imperfections along the surface of a part. Optical comparators can measure within a two-dimensional space, as opposed to other tools, like micrometers, that measure only one dimension at a time. More generally, optical comparators are very easy to use even by novice metrologists and can provide a great deal of information in a relatively short amount of time. Another great advantage of optical comparators is that only light comes into contact with the part you are measuring during the measurement process, decreasing the risk of damage when measuring more delicate parts. Finally, optical comparators come with major cost savings, ergonomic designs, reduced inspection time, and reduced costs of training.
- How does an optical comparator work?
- The best analogy to think about when describing how an optical comparator works, is that of the classic classroom projector that your teacher likely used to go over homework or explain concepts to you when you were in middle school. Similar to this projector, the optic comparator works on the basic principle of projecting a magnified image of the part you are measuring against a screen. The optical comparator is built with a series of very accurate lenses that magnify and transpose the part image. Additionally, optical comparators are built to be stable devices that are placed at fixed distances from the screen being used, in order to ensure a highly precise image and therefore measurement. The whole process through which an optical comparator works uses optics, or the physical principles of light, in order to make measurement easier and more flexible.
- What are the three main ways to take measurements using an optical comparator?
- One of the incredible capabilities of an optical comparator is that it can complete measurements in numerous ways, depending on what you are measuring and the size of your part. One measurement technique used with optical comparators is to directly compare the projected image created to measurement units such as a ruler or protractor. These image measurements are easily converted back to the corresponding measurement of the part because the level of magnification and exact location of the part are known. A second way to measure with an optical comparator is to use screen rotation. Screen rotation utilizes a marked zero point on the image in order to measure various angles on the image, which are then converted back to corresponding angles on the part. A third common measurement method involves using measurement by motion. Ideal for larger parts that cannot be completely projected at once, measurement by motion requires the operator to move the worktable or use a sliding fixture built right into the machine. Optical comparators are great tools that can do a range of measurements for a range of parts.
GLOSSARY TERMS
- Optical comparator
- An optical comparator is a precision measurement device that uses the physics behind the properties of light in order to inspect the size and shape of manufactured parts. Similar to a classroom projector, an optical comparator projects a magnified image of a part onto a backdrop screen. A series of very precise lenses and the fixed location of the device help to create an image on the screen that is very accurate and measurable. When using an optical comparator, it is possible to compare the image to measurement units, use screen rotation to measure part angles, or use measurement by motion to measure larger parts.


